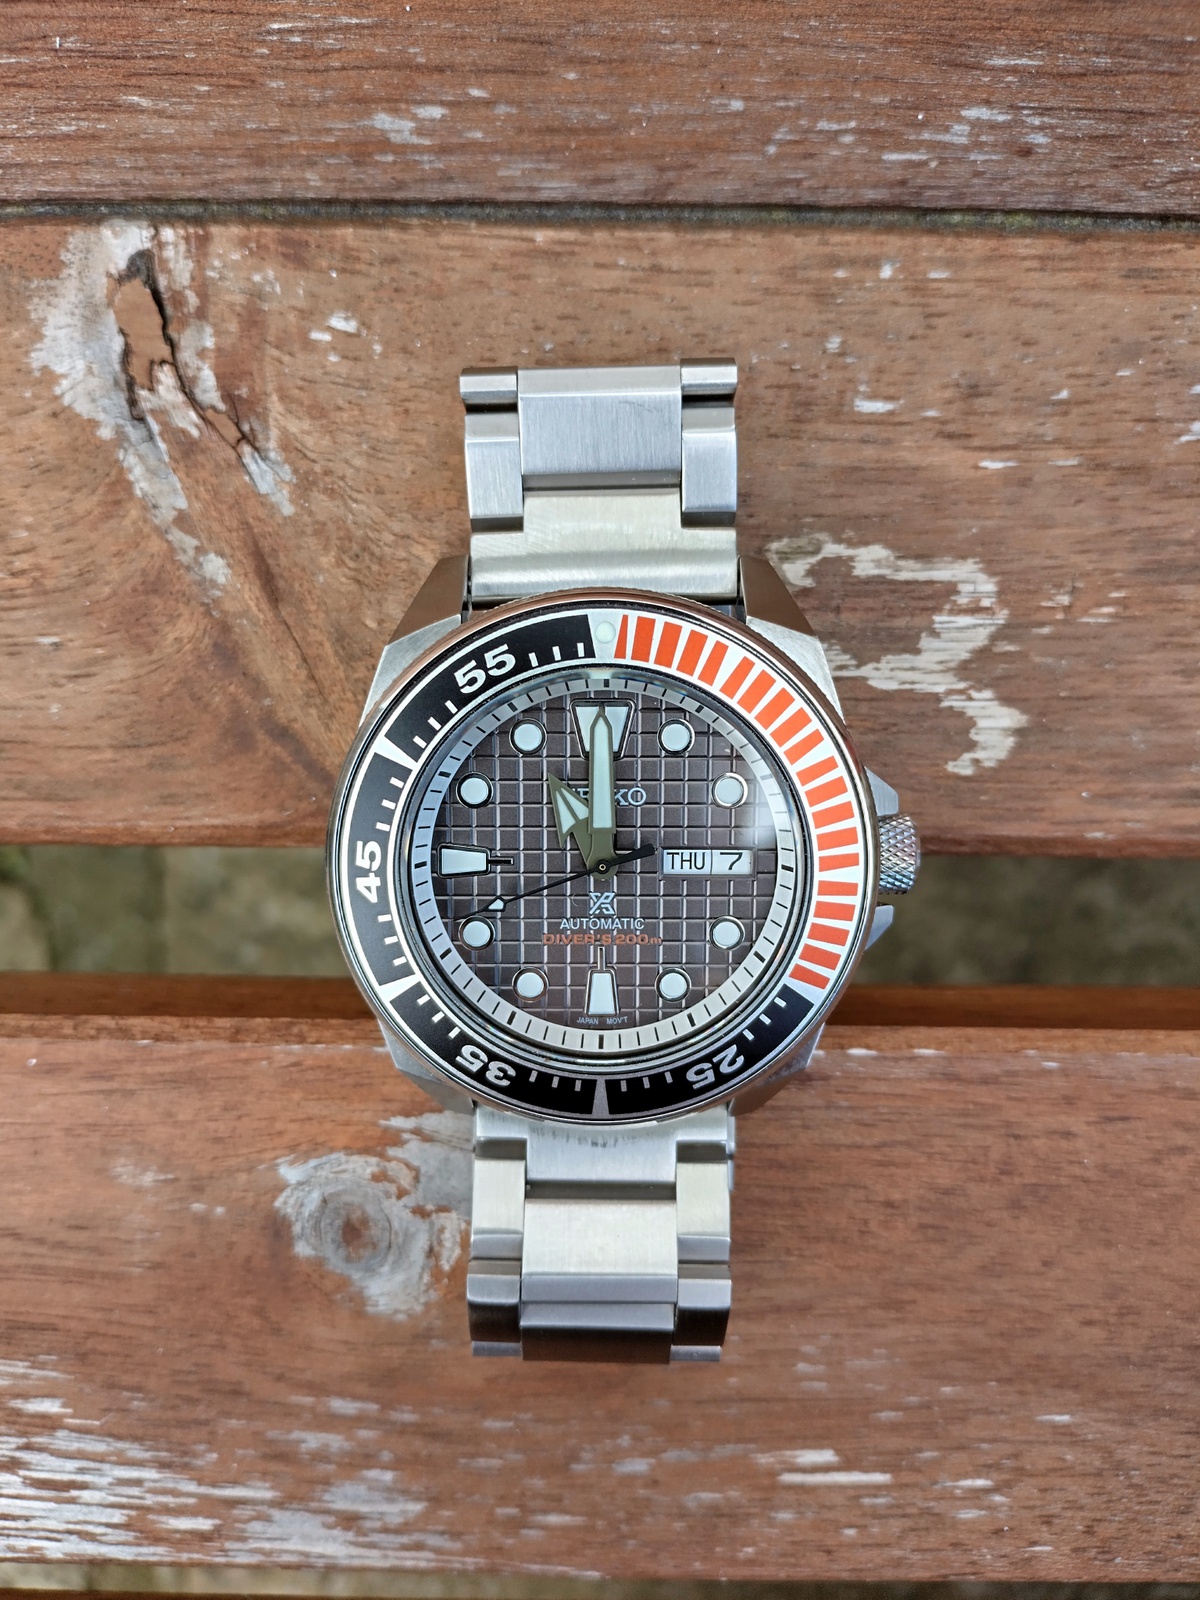
The Seiko Samurai and Seiko Turtle are two watches that first caught my eye and got me into this hobby, and though I’ve had a vintage Turtle for a long time, I’ve lusted after the Samurai but had never picked one up. Seikos get a lot of hype and, in my opinion, aren’t great value considering what you’re getting. On top of it all, while I do really like the angular look of the Samurai, I never liked that it doesn’t have a day/date window (like the Turtle), and I like round indices of the Turtle, not the all-rectangular-indices on the Samurai dial. When the “King Turtle” was released with the waffle (aka “grenade”) dial + day & date, I immediately loved it, along with the sapphire crystal upgrade – except they went and stuck an ugly cyclops over the day & date, yuck!
So imagine my joy at seeing Samurai cases available on Aliexpress, with knurled crown and bezel, and sapphire crystal, then finding Samurai hands, and then seeing you can get a King Turtle waffle dial, all suitable for the NH36A Seiko movement, which has the day & date… take my money!
Speaking of money: it wasn’t a lot. If you were buying a new Seiko King Turtle, or a Seiko King Samurai, you’d be looking at around €650-€750; you will find them less expensive secondhand, but you’re still looking at €400-€550. As I’ve said before, I’m not prepared to spend anything like that, and I didn’t: all together, I’m out about €100 for this build. (This doesn’t include the bracelet, which I already had, along with most of the tools required.)
What do I get for this? A Seiko NH36A movement, flat sapphire crystal, signed crown, 200m water resistance (untested, but I wouldn’t be afraid to swim with this), a King Turtle waffle dial in a Samurai case. The best part? I get to put it together myself! If anything goes wrong or I want to change something later, I know I can swap, repair or replace it as I like.
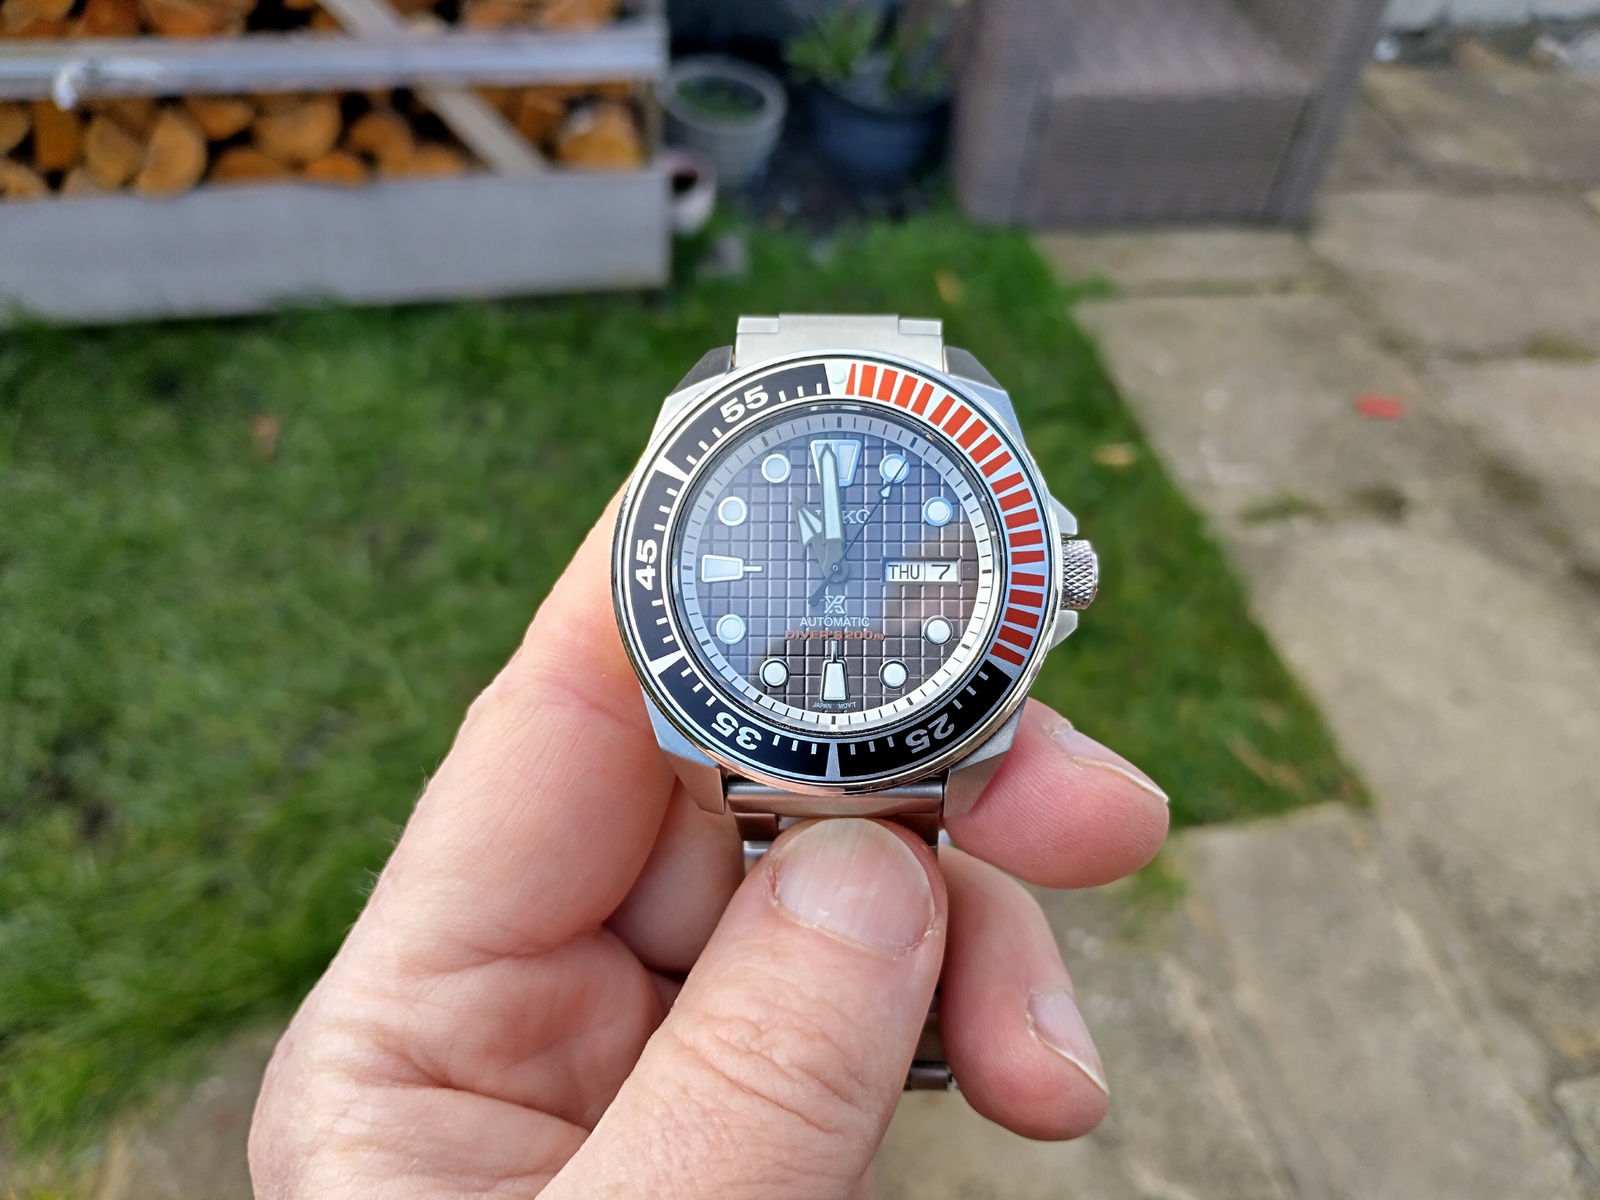
What would I change, if anything? An orange tip on the seconds hand would be nice, but I’m loath to remove the hands now they’re on (especially the seconds hand). I’ve got a few straps on order, that should match the orange color in the bezel insert. The 3-link 22mm metal bracelet is very comfortable, but the end links don’t match up with the Samurai case (it was off my Addiesdive “Puck”), which is a minor thing. The dial and chapter ring are a little bit “busy”, though I expect to get used to this. If the chapter ring were black or orange, I think that’d have looked a lot worse than silver, which at least matches the case. Anything not an exact perfect match for the dial – which I could never guarantee – would look terrible.
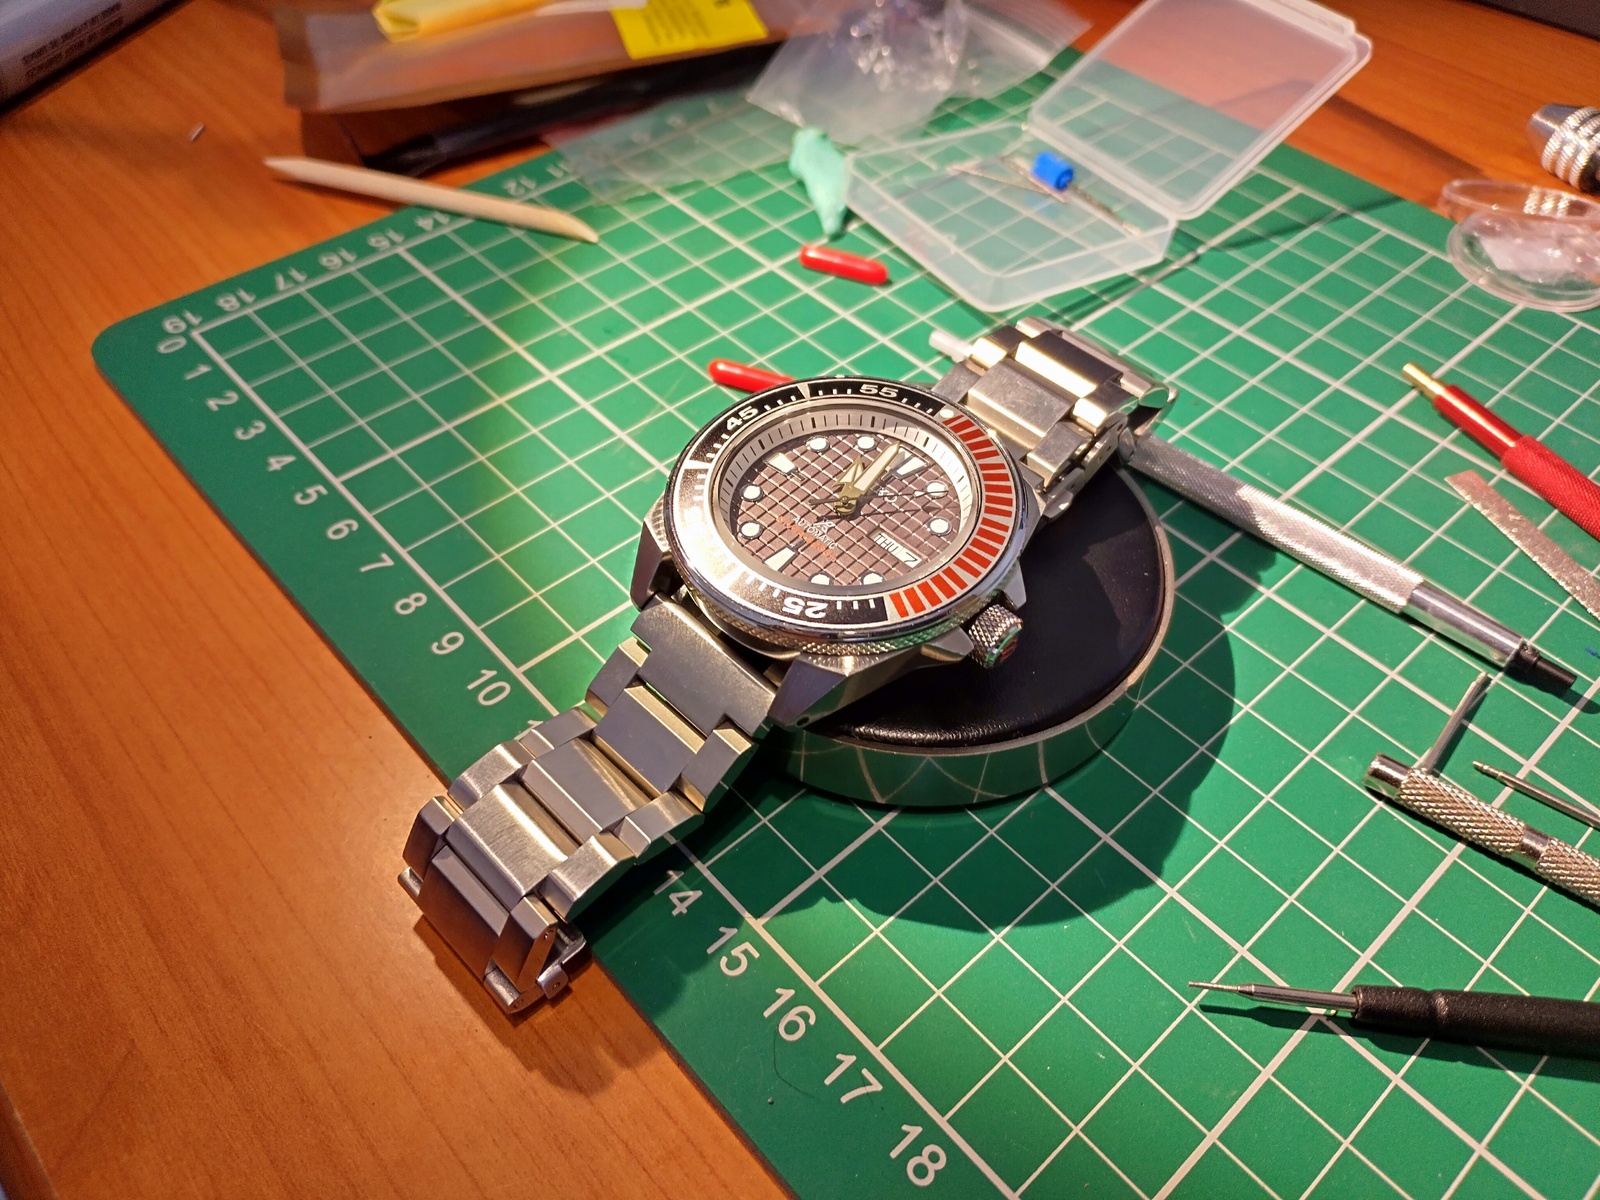
Below are the parts and most of the tools I used (some are out of the shot); read on if you want to know the basic steps of completing this build.
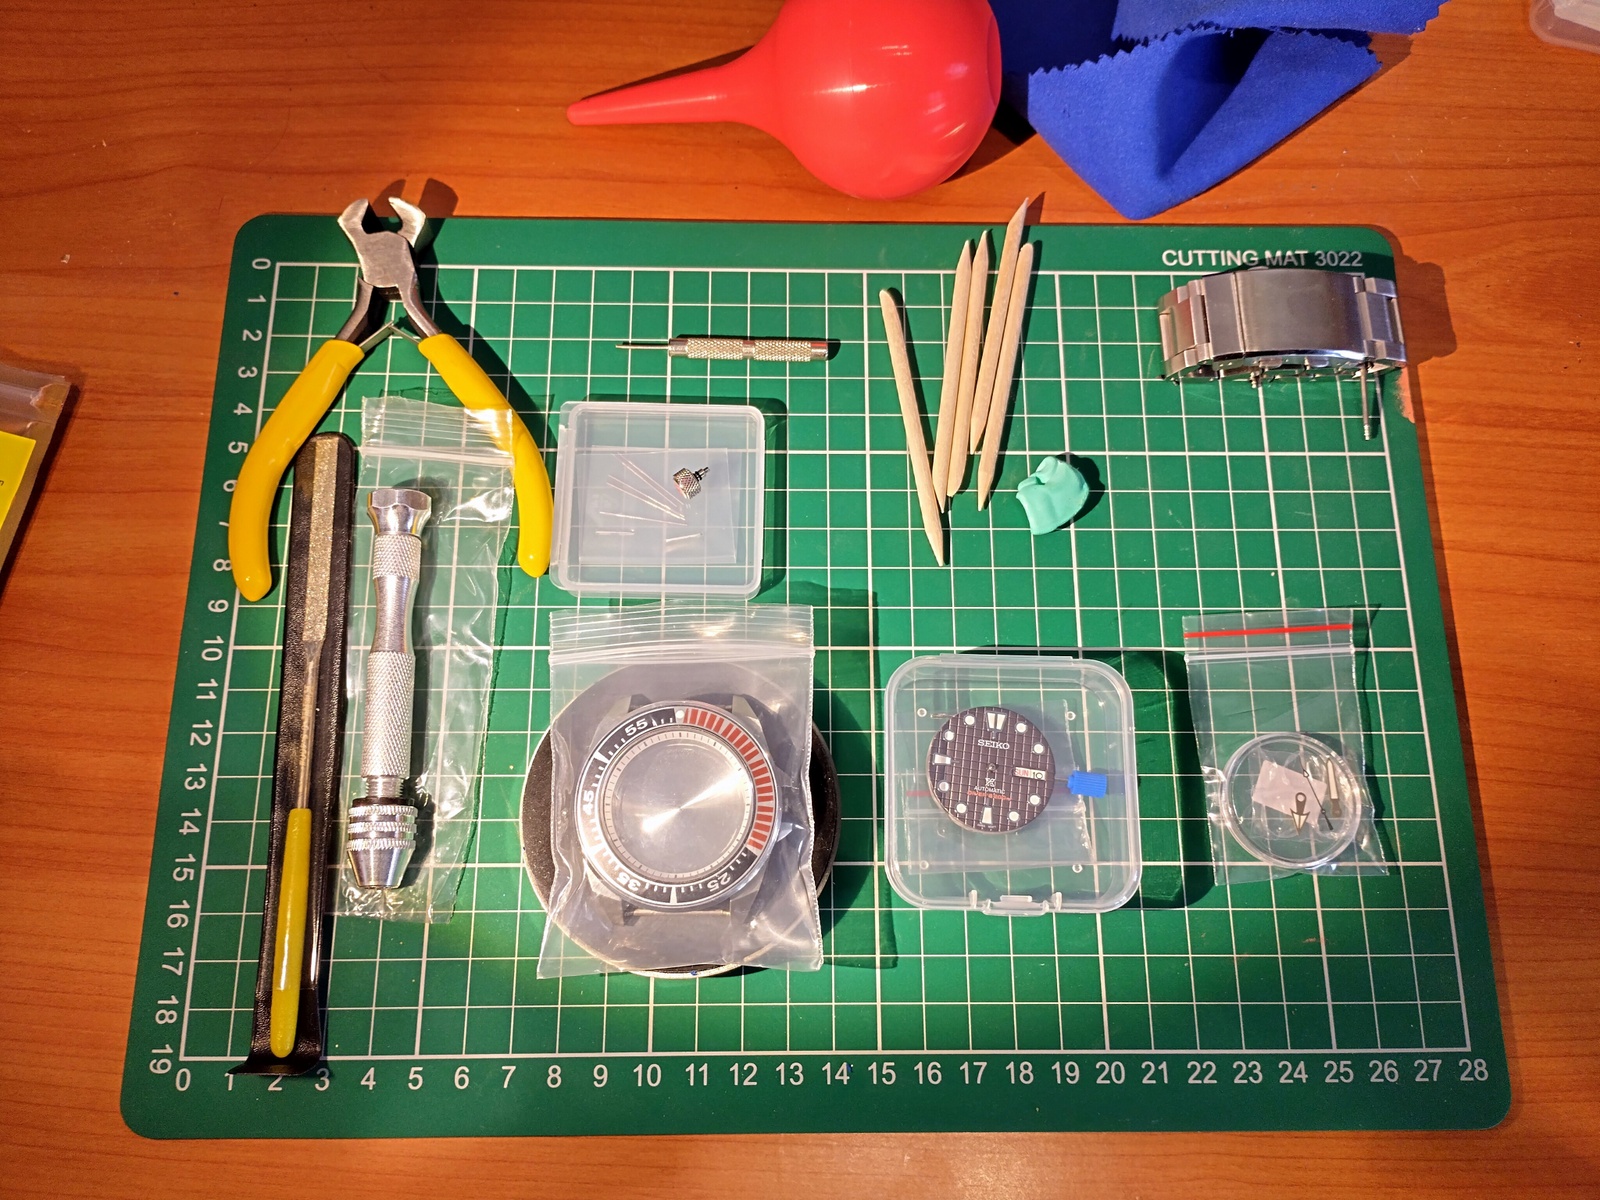
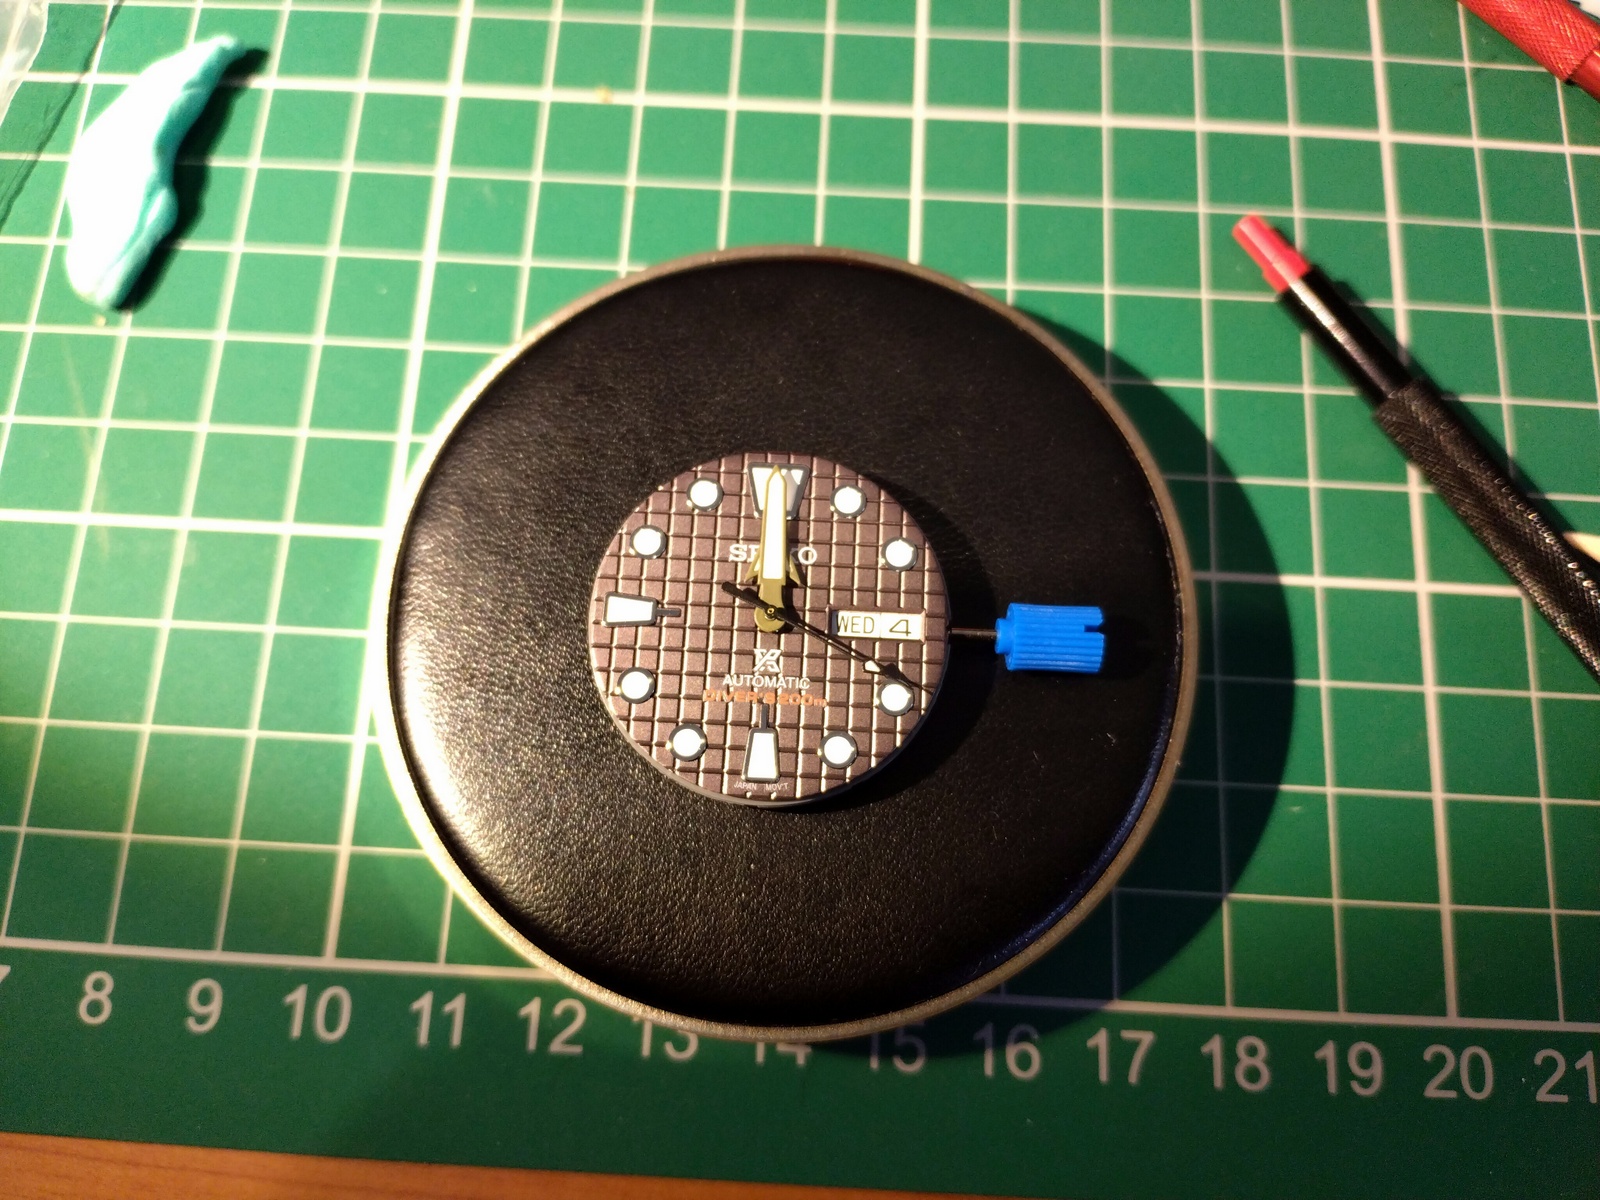
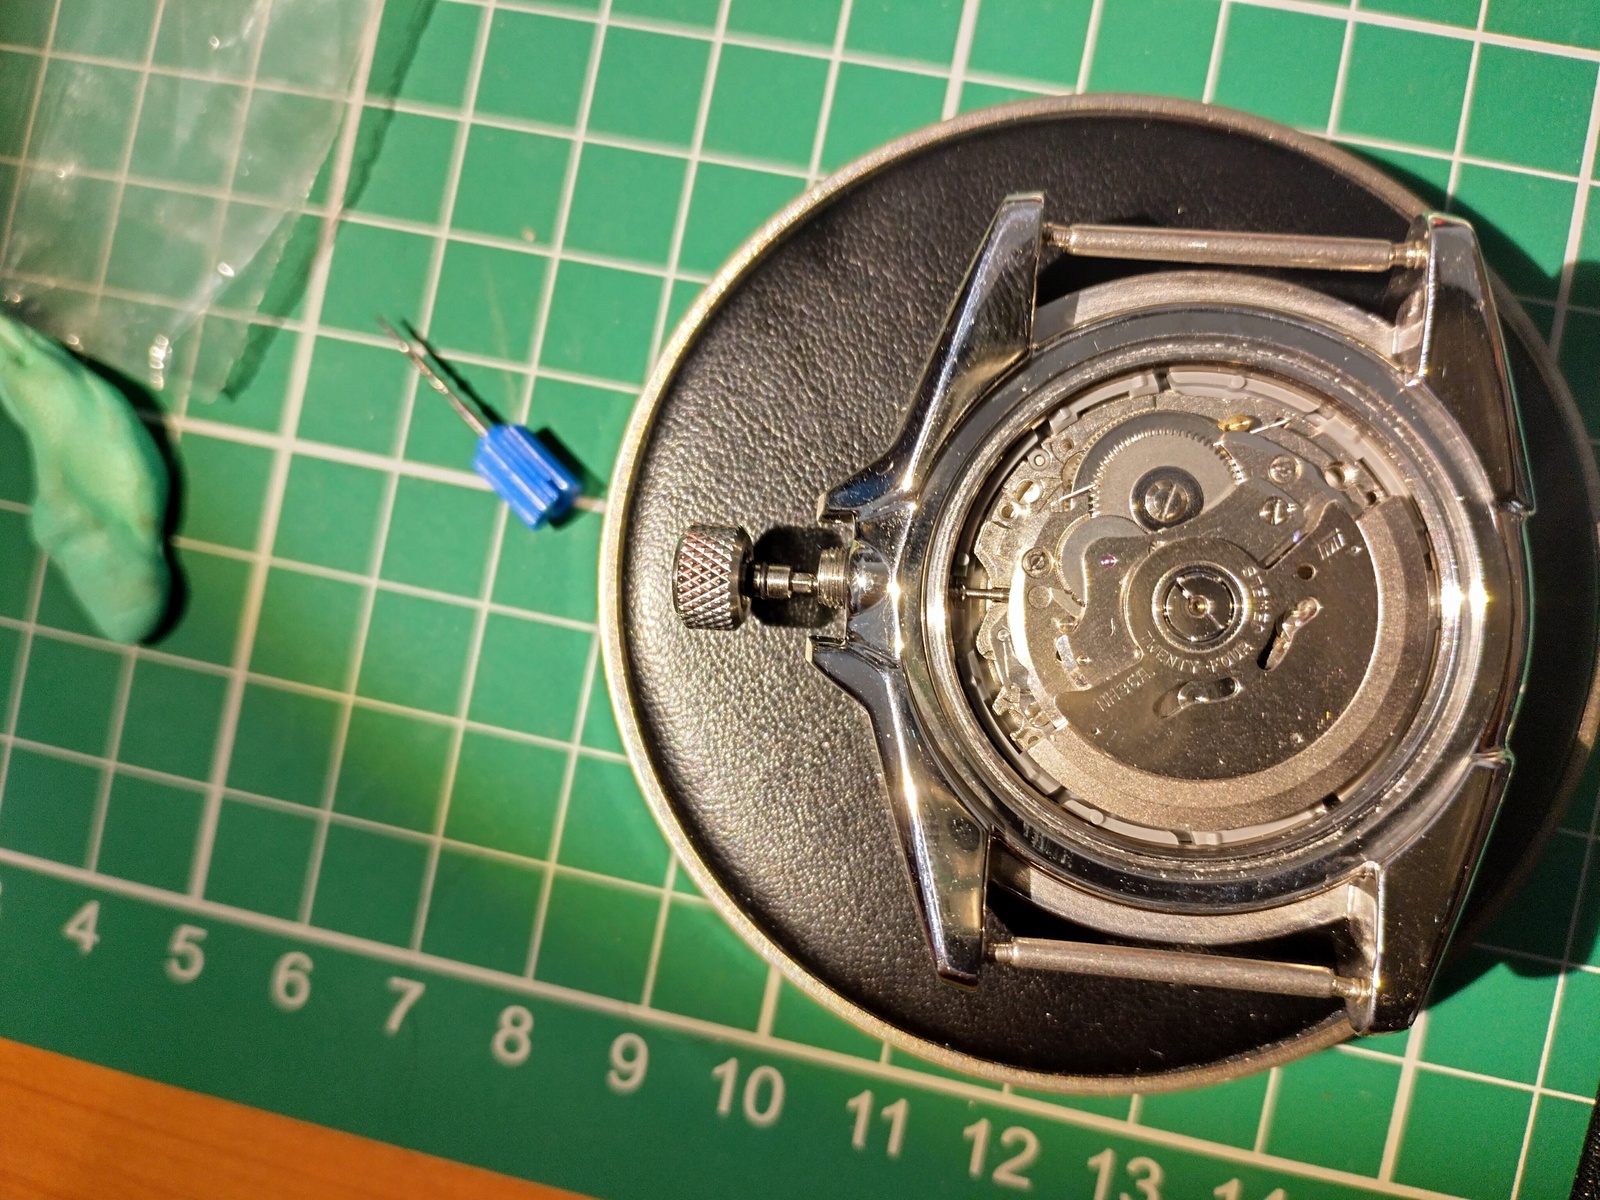
The basic steps: put the dial onto the movement. This requires cutting off and filing down the unnecessary dial feet, maintaining the necessary ones. Pretty simple. If the dial feet didn’t line up, you can remove all the dial feet and use “dial dots” (very thin bits of double-sided tape) to adhere the dial to the movement. This requires more skill, to place the tape, and align the dial window with the day & date on the movement. Set the hands onto the movement. This requires setting the time forward to midnight so that the day has just flipped. Set the hour hand at 12 o’clock, ensuring it’s seated and level throughout it’s rotation (and isn’t interfering with the dial). Then set the minute hand similarly, ensuring it’s seated and level, not interfering with the hour hand, and everything ticks over when the day changes at midnight. Finally (and the hardest part) set the seconds hand. It’s very tiny. Cut the crown stem. This took me two tries, getting it on the second attempt. Set the movement into the case. Thread the crown onto the stem and insert into the movement. Measure the distance from the base of the crown to the base of the threaded part of the case. Cut the stem accordingly. (Sounds easy!) File off the jagged edge after the cut, reinsert it all and check the crown inserts far enough, but not too far, so that it pops out completely and allows all functionality (hand winding, time setting) while screwing down completely for a waterproof fit. When you’re happy it all works, apply threadlocker to the stem so the crown stays on the stem as it should. Clean and assemble. Take your rodico (cleaning putty), clean microfibre cloth, and dust blower, to remove any specs of dust or debris that has likely landed in the case, on the dial, and in the movement. Don’t forget to lubricate the case back gasket!